Add a model to the scene
This section will walk you through uploading a source file and adding it to a 3D scene.
💡 Quick reminder: The Main Scene you open with the Livelink.js should be in the Public folder to be accessible using the Public Token. However, you can create your folder structure to organize your other assets. You can still reference them from the Main Scene or open them directly.
Upload a file
Before starting, you’ll need a source file with a 3D model. This example uses the Utah Teapot as a reference, but feel free to use any other 3D model, ideally a simple model with a single mesh. You can find some models on sites like turbosquid.com.
💡 You can find the full list of 3dverse supported file formats here.
To upload the file:
Navigate to the Asset Browser
Click on the + New then Create folder.
![[object Object]](/images/docs/ea6535bd-d29e-406b-9d11-4b3b5b2456e8/image_25-9c40d488-639a-455b-a6e4-e6ce29a1cc5b.png)
Once the folder is created, name it Teapot then double click on it to open it.
Upload the 3D file (.zip in the case of the teapot) by dragging and dropping it into the folder.
💡 Once the file is uploaded, it will go through a conversion process. To view the list of recent conversions, click on the conversion icon located at the top right of the Asset Browser. The conversion transforms the source file into 3dverse asset(s). The conversion output may be a single or multiple assets depending on the source file's content.
Once the conversion is complete, a new Scene asset will appear in the Asset browser. You might also find textures or materials which were part of the source file.
Once the conversion is complete, a new Scene asset will appear in the Asset browser. You might also find textures or materials which were part of the source file.

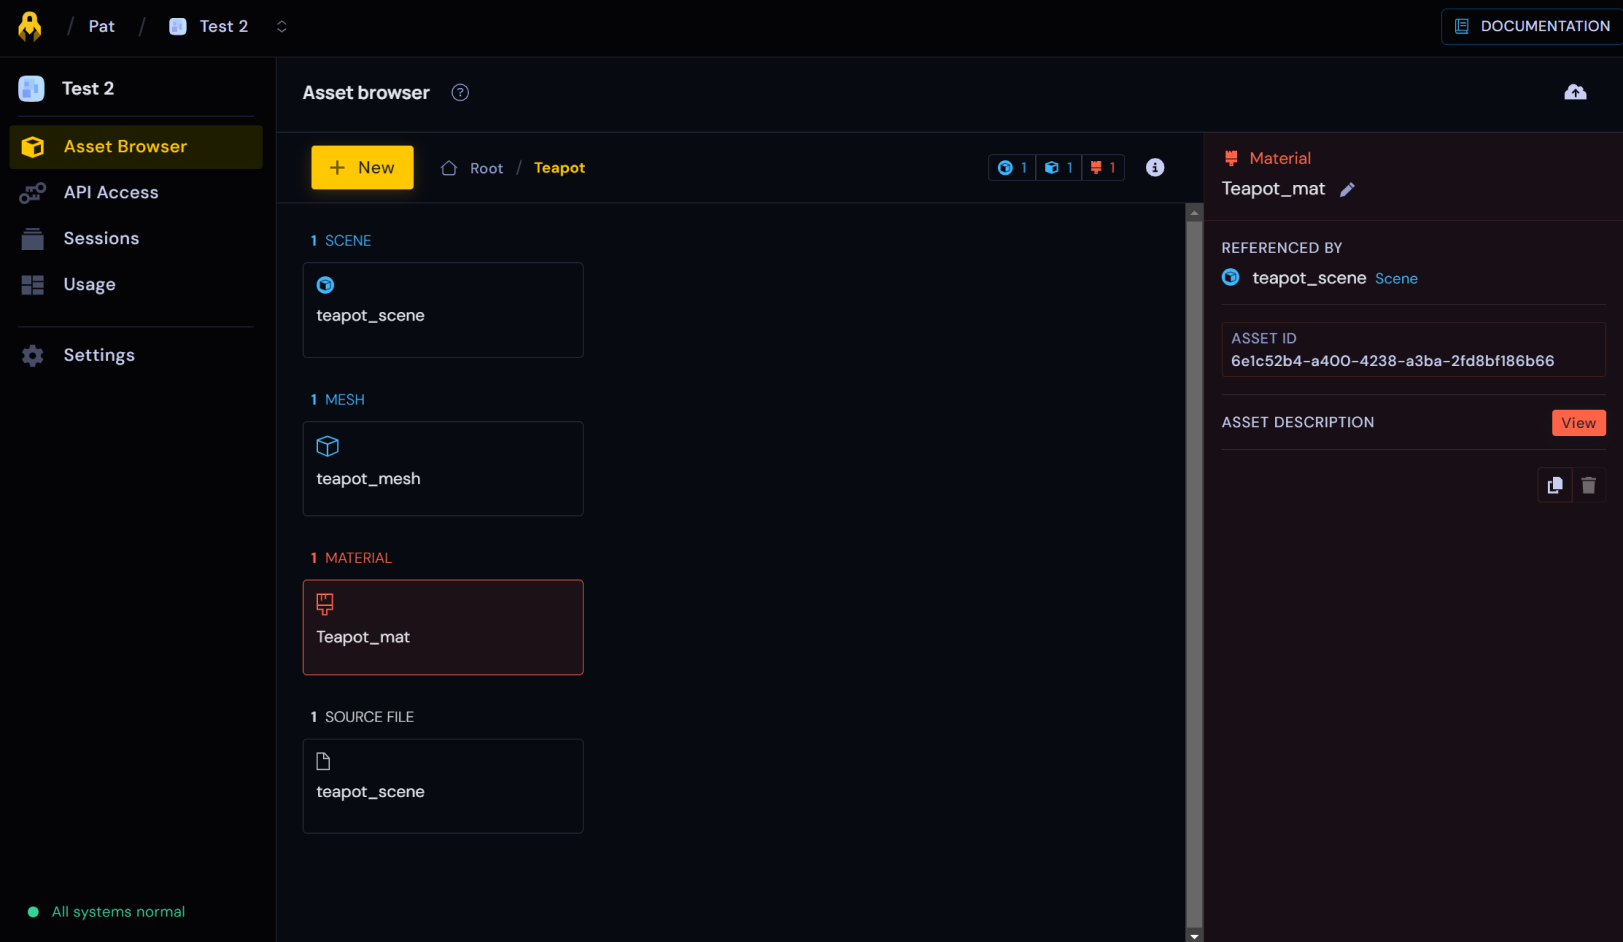
Renaming the assets
💡 NB: The Material Asset won't have a file name if you used the Utah teapot.
Rename the asset by clicking on it. Navigate to the side panel and click on the pencil icon.
Then rename your assets:
- The teapot scene to teapot_scene
- The mesh to teapot_mesh
- and the Material to teapot_mat
Editing the Scene using the Scene Editor
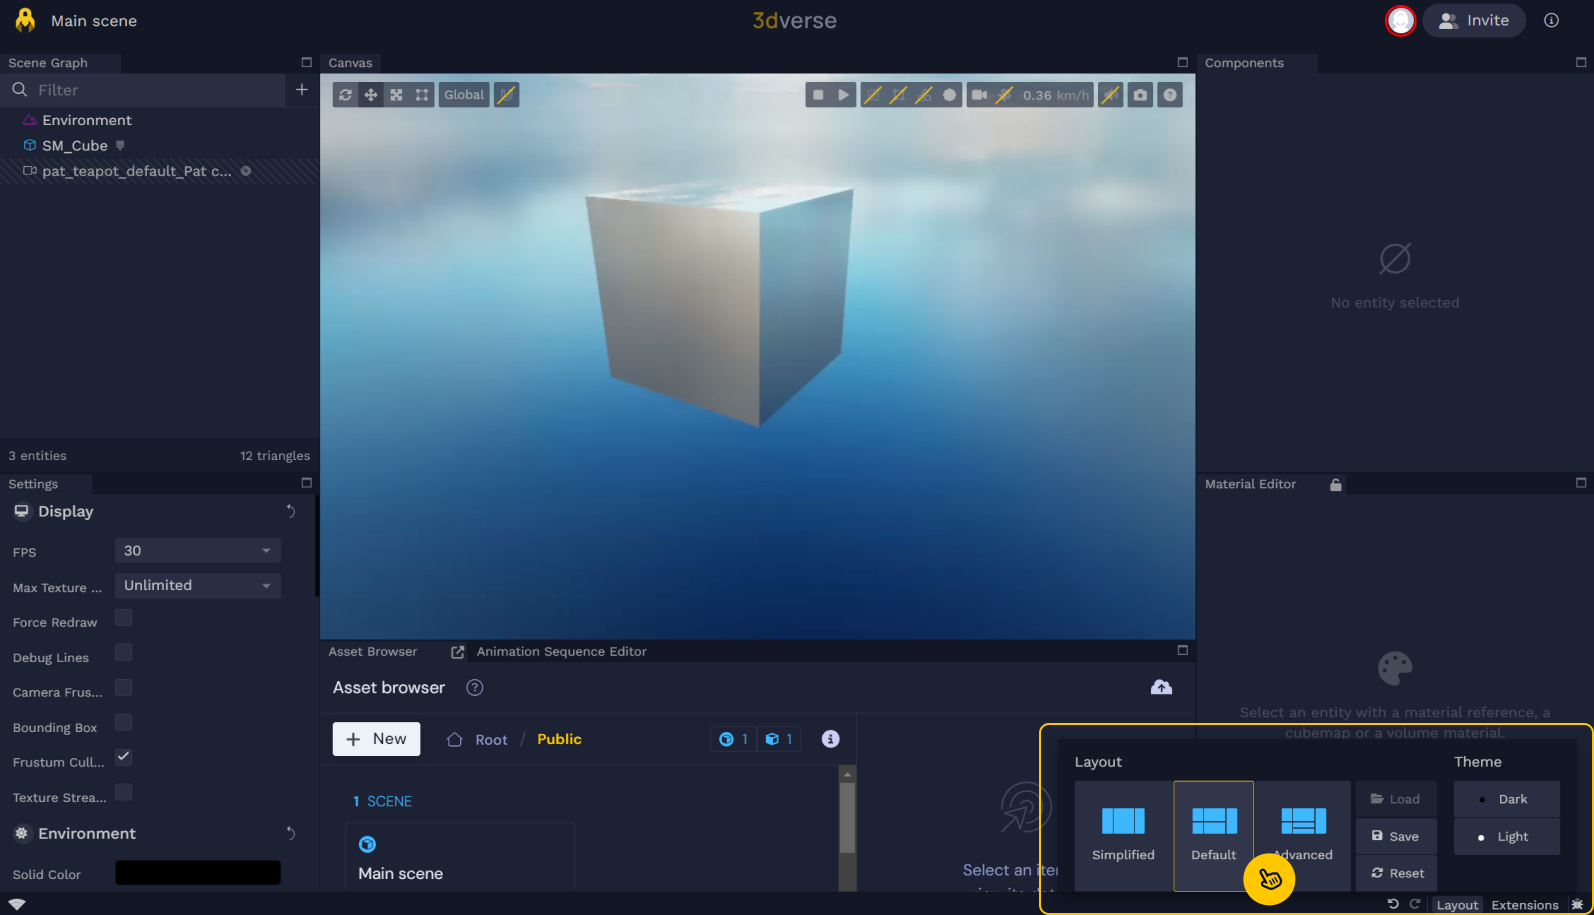
In this section, we will remove the cube and add the Teapot. Open the Scene Editor (by double-clicking on the Main Scene in the Public Folder). Don’t be surprised- it’s normal to see the cube and not the teapot just yet!
💡 The Scene Editor is made up of extensions which can be repositioned by dragging and dropping around the page. First, make sure you are using the Default Layout by clicking on the Layout button in the bottom right corner.
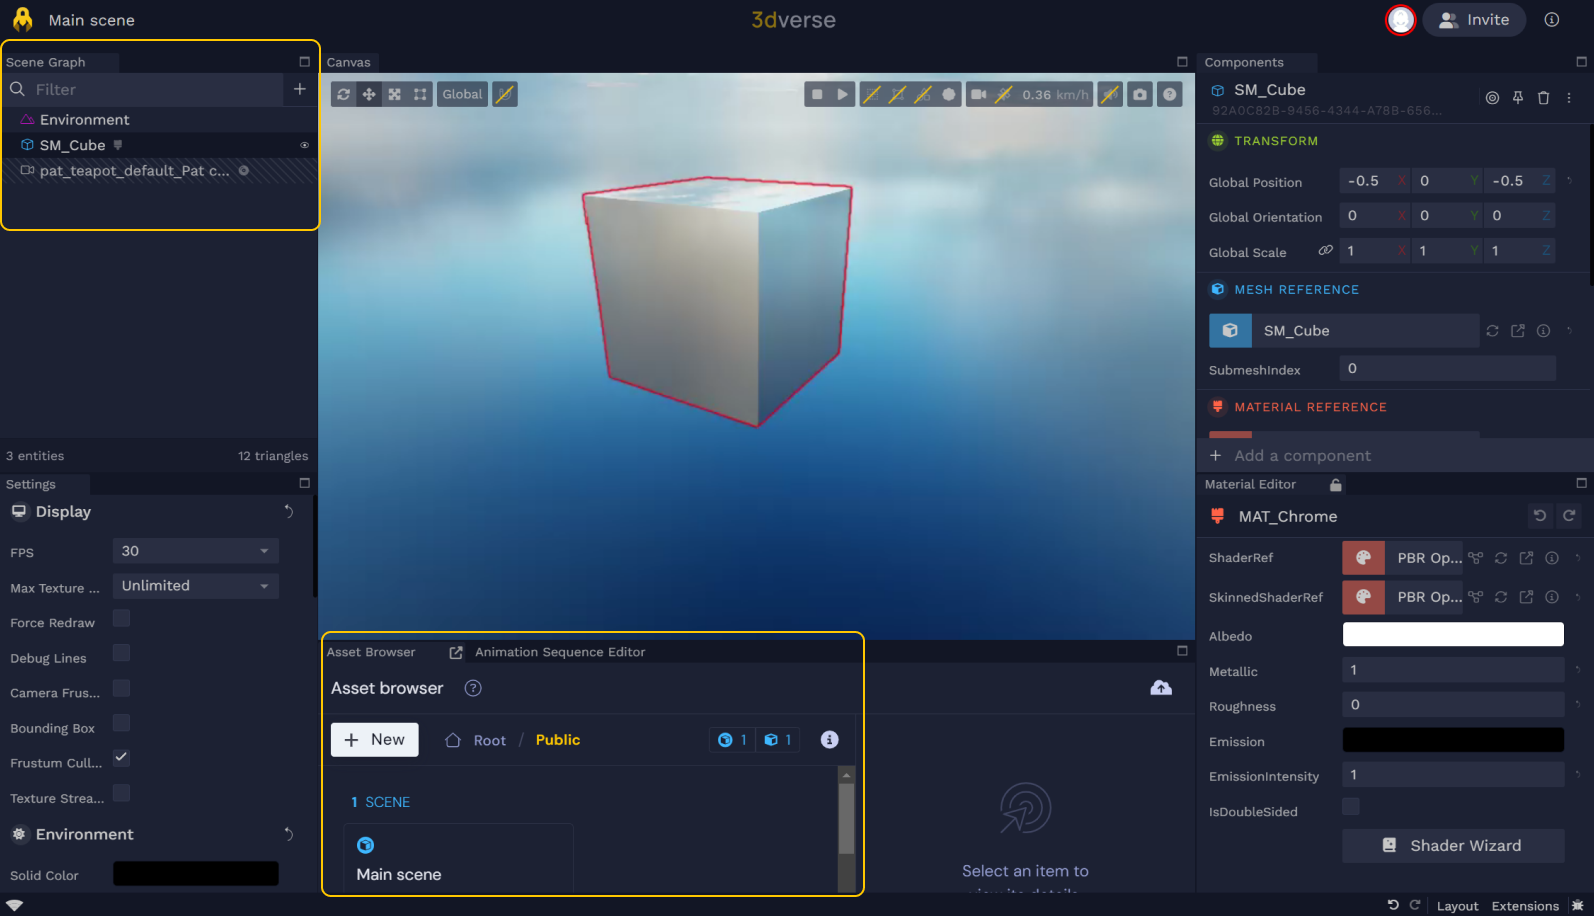
On the left side of the Editor, you’ll find the Scene graph with the list of entities and their hierarchy in the scene.
On the right, you’ll find the list of Components attached to the selected Entity.
💡 3dverse uses the Entity Component System (ESC) pattern to build 3D scenes. If you are not familiar with this concept, make sure you read the ECS primer.
At the bottom, you’ll find the Asset Browser.
💡 The cube is highlighted in red because it was clicked on to show the Components window.
In the Scene Graph panel, right Click on SM_Cube and delete it.
In the asset browser, navigate to the teapot folder and drag and drop the teapot_mesh into the scene graph (left side) or directly into the 3D scene.
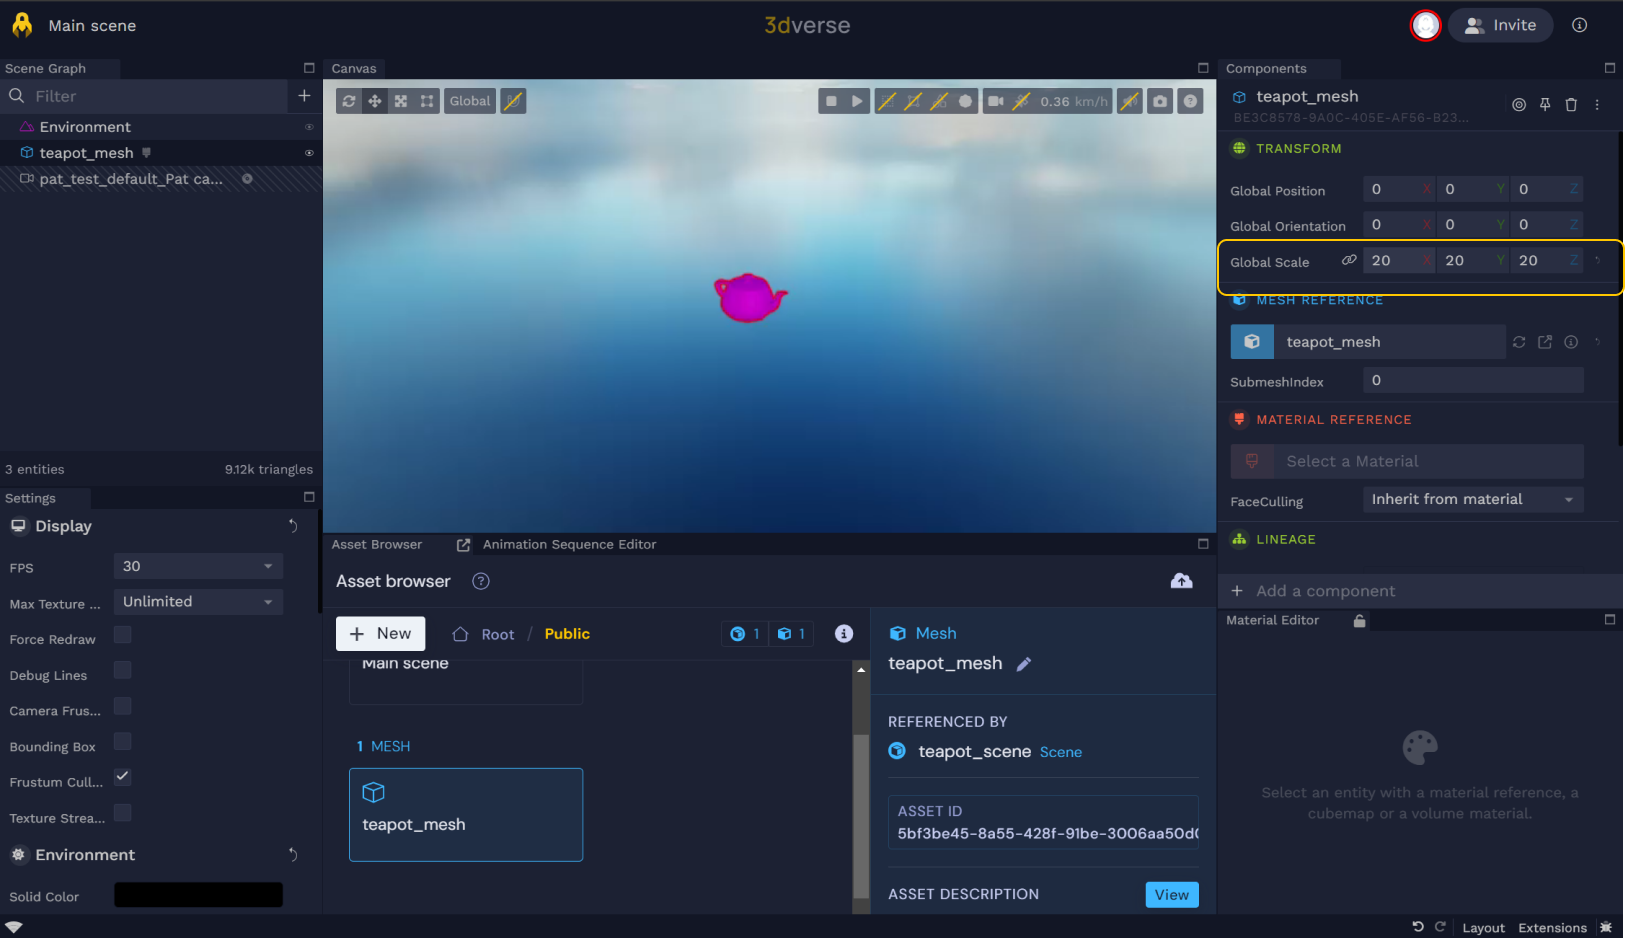
💡 You’ll notice a new entity was created in the Scene graph - due to its size you won’t really see it in your scene - let’s fix that.
Click on teapot_mesh navigate to the components panel and change its global scale to 20.
Add a material reference to the mesh
💡 If you notice that your 3D asset is purple, there is no material reference or a problem with the material.
In the Asset browser, navigate to the teapot folder and drag and drop the material asset teapot_mat on the teapot_mesh onto the asset in the scene. Notice that the teapot is no longer purple.
After selecting the Entity, you can also explore its components on the right side of the Editor.
Let’s quickly go through the components attached to the Entity:
- The Transform keeps track of the Entity’s position in the Scene. You can toggle the Transform view between Local (relative to it’s parent entity) and Global (relative to the scene origin).
- The Mesh Reference references the Asset UUID of the newly converted Mesh asset.
- The Material Reference references the Asset UUID of the Material attached to the Mesh.
- Lineage keeps track of the Entity’s position in the Scene graph (ie: parents + siblings).
- The Bounding Box gives information about the model's size.
💡 In the next section, you’ll add more entities to the scene to customize the look and feel.