Animation sequence
📽️ The animation sequence asset allows you to create entity-based animations directly in the scene editor. More specifically, you can animate the component data of entities.
Simple examples of animations that can be done with animation sequence:
Animating the albedo of a material component
Animating the position of a local transform component
What is an animation sequence?
Animation sequences are used to animate the component data of entities. They can be used to make a cinematic cut scene, or a simple animation that livens up your application. They can also emit events as they play, which are listenable in client-side Livelink.js code and in scripts, allowing your application to react to key points in a sequence.
Animation sequences are composed of tracks. A track is made of up keys which have an associated value and time. There are three different kinds of tracks: animation, trigger and event. Animation and trigger tracks are used to animate an entity’s component attribute, and event tracks are used to emit events.
You can use the same animation sequence multiple times in a scene with different sets of entities assigned to the tracks. To add an animation sequence instance to your scene, add an entity with an animation sequence controller component and link your animation sequence to it. You will be able to then assign the entities to each of its tracks.
Animation Track
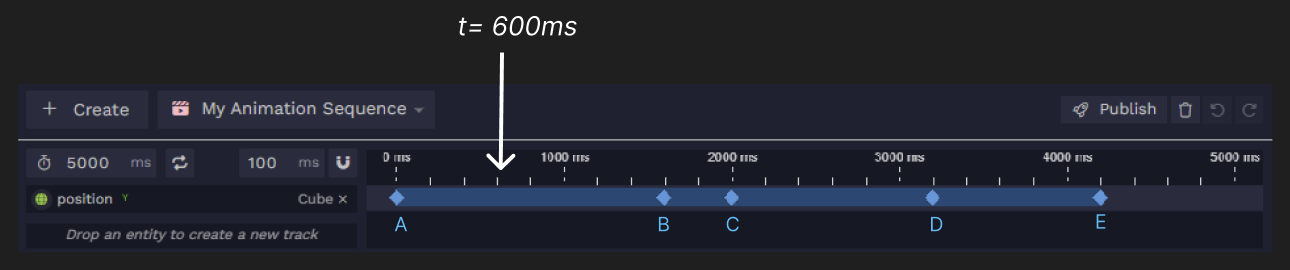
Animation tracks are used to animate an entity’s component attribute. An animation track will interpolate between keys. At a time t of the animation sequence playing, the two keys between which t fall will be the keys that are interpolated.
In the example below, at time 600ms, the animation sequence will set the entity’s position to the result of the interpolation between the values of keys A and B.
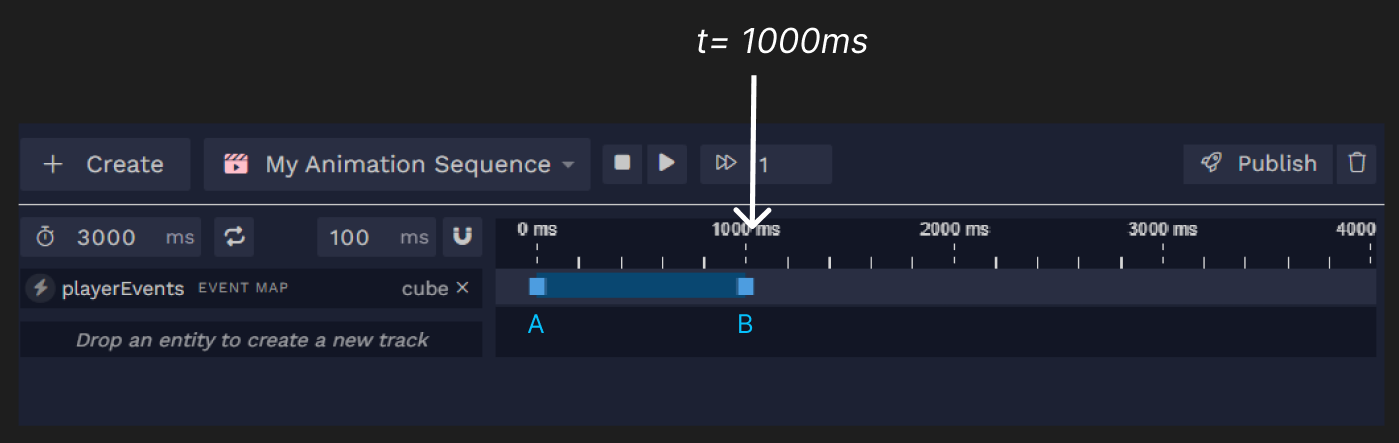
Trigger Track
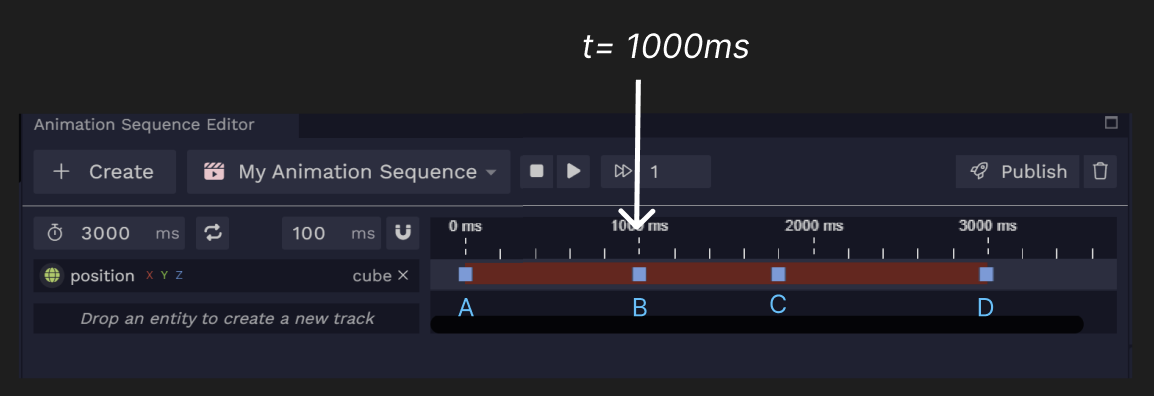
Trigger tracks are also used to animate an entity’s component attribute. Unlike animation tracks, a trigger track will not interpolate between keys, but will simply set the key value at the key time.
In the example below, at time 1000ms, the animation sequence will set the entity’s position to the value specified by key B.
Event Track
Event tracks are used to emit events of an event map asset. Its keys correspond to specific events in the event map specified upon creating the track. While the animation sequence plays, these specified events will be emitted at their specified times.
Event tracks are also associated to an entity, which will be the one emitting the specified events.
In the example below, at time 1000ms, the entity “cube” will emit the event specified in key B.
To create and edit event maps, you must do so in the Event Maps tab of the script editor (create a script and double click on the asset browser). Unfortunately event maps do not have their own dedicated editor for the moment.
To listen and react to events emitted by an animation sequence, you can do so either in a script asset:
![[object Object]](/images/docs/ce752a3f-300d-4095-ac99-7e2e5ec3a10d/Untitled-71dbea6f-5fac-4514-8d46-8a4db8751300.png)
Or you can do so in Livelink.js client code with registerToEvent:
Animation sequence editor
To edit an animation sequence, you need to use the extension “Animation Sequence Editor” in the scene editor. Click on Extensions in the bottom right of the scene editor and then drag the animation sequence editor where you would like to put it.
To select the animation sequence you want to edit, click on an entity with an animation sequence controller which refers to that animation sequence.
📽️ As you’re working, the progress you make will be automatically saved in the animation sequence editor. You can close the session and open a new one and nothing will be lost. However, when you’re ready to compile your animation sequence and see your changes reflected in the playback, make sure to press Publish.
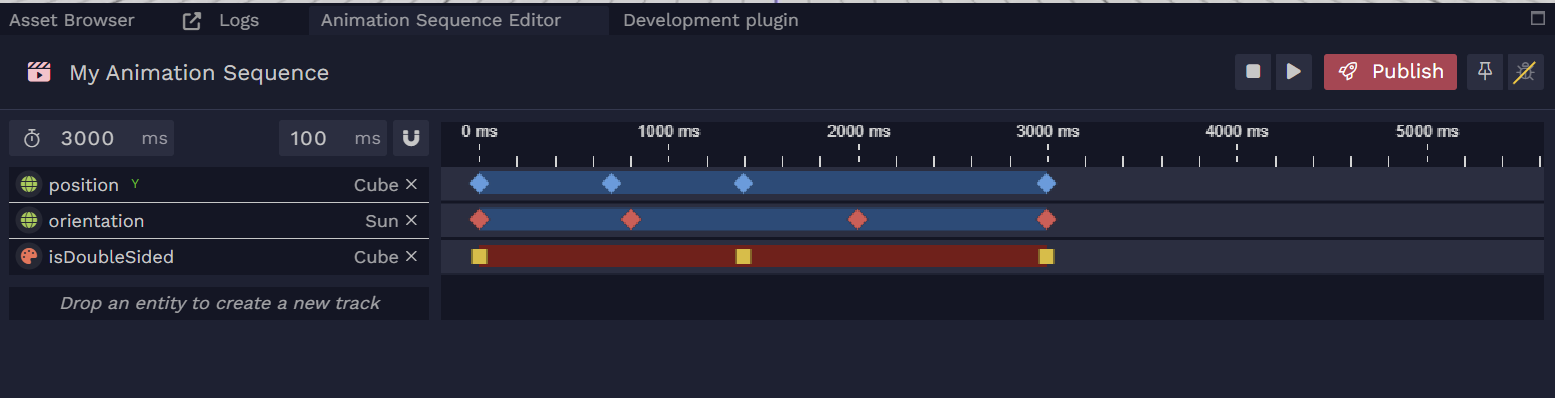
A general overview:

Create/publish/delete animation sequence
To create and delete an animation sequence instance, do so in the asset browser. To assign it to your scene, create an entity with an animation sequence controller component and assign said animation sequence to it. When you select the entity and if you have the animation sequence editor open, you will be able to edit the animation sequence.
📽️ To see your changes when you play, press “Publish” in the animation sequence editor.
When you need to publish to see your changes, the publish button will turn PINK!
When you need to publish to see your changes, the publish button will turn PINK!
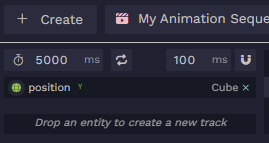
Modify duration of animation sequence
Under the + Create button, you can modify the duration.

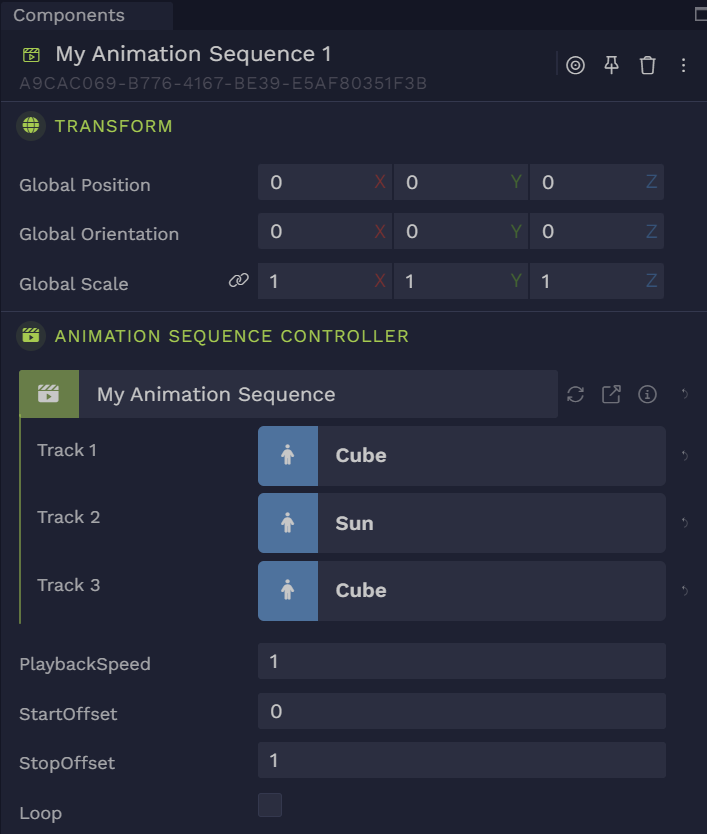
Modify loop, playback speed, start offset and stop offset
You can modify the loop, playback speed, start offset and stop offset of animation sequence in the animation sequence controller. Therefore these parameters can vary by instance of animation sequence. The start and stop offset are expected to be normalized between 0 (= start of animation) and 1 (= end of animation). A negative playback speed will play the animation sequence in reverse.

Create a track
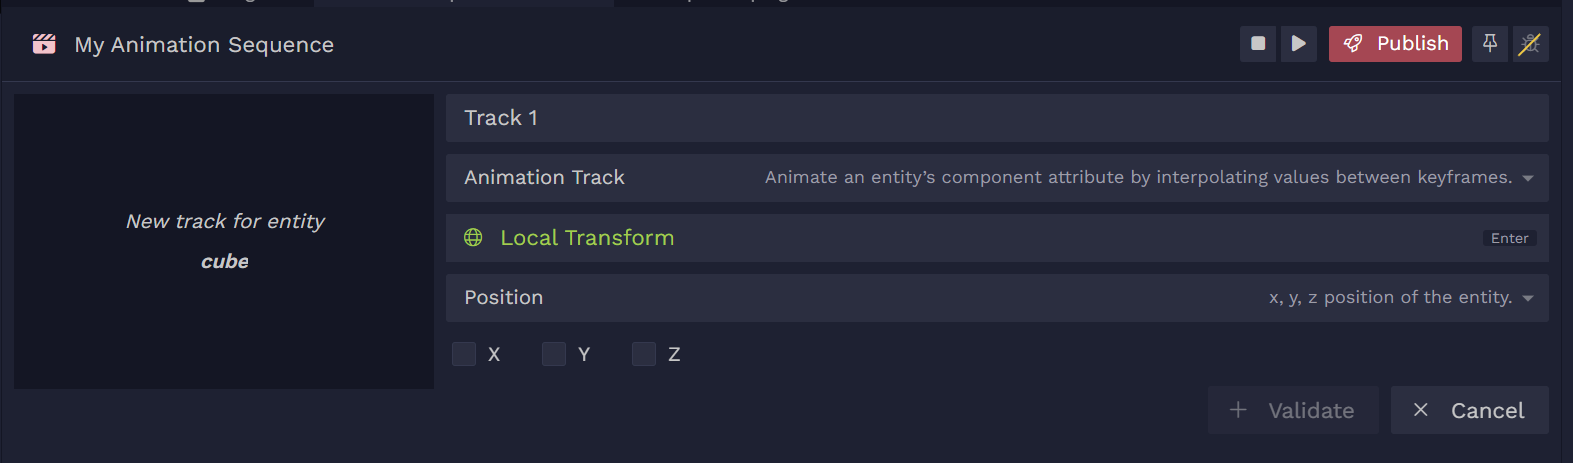
Drag and drop an entity from the scene graph to “drop an entity to create a new track” . You can animate all entities (including external entities). This will create a new track in the animation sequence and automatically assign the entity to that track in the animation sequence controller of the currently selected animation entity.
You will be given the option to decide what component attribute (like transform.position.y or material.albedo.xyz) you want to animate in that track.
🚨 Limitation: You can animate an overridden component of an external entity, but you cannot animate a new or deleted overridden component of an external entity.
There are three different kinds of tracks you can create.
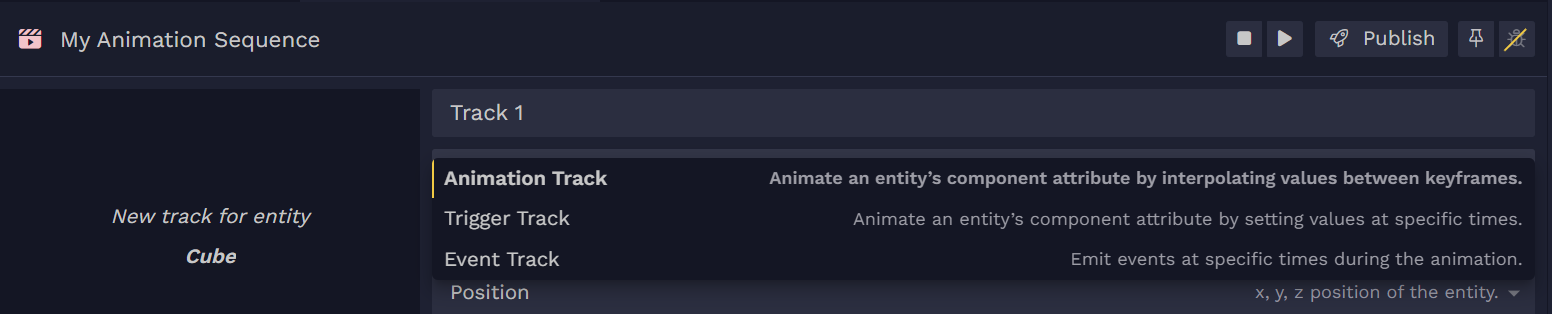
Animation track: the component attribute will be interpolated between keys.
Trigger track: the component attribute will be set at each key. No interpolation will happen.
Event track: the entity will emit an event that can be listened to in Livelink.js code and in a script.
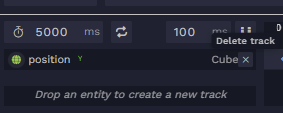
Delete a track
Create a key
Double click on the track to create a new key at that time. You can always modify the time more precisely afterwards (check “modify a key”).
![[object Object]](/images/docs/ce752a3f-300d-4095-ac99-7e2e5ec3a10d/0284acbe-fc60-47b3-b47a-a45fcf84b997-7dca857b-d933-46be-b9bf-8d7e3757e4fb.png)
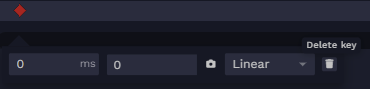
Modify a key
![[object Object],[object Object],[object Object]](/images/docs/ce752a3f-300d-4095-ac99-7e2e5ec3a10d/ae1ac6b9-55e0-4d50-9d7c-8b781fa9ef9e-0153c6c1-9736-4e07-ae40-de03bee3f321.png)
![[object Object]](/images/docs/ce752a3f-300d-4095-ac99-7e2e5ec3a10d/Untitled-93831697-497a-4b20-85a5-1fa558b30604.png)
Delete a key
Modify sequencer time range
![[object Object]](/images/docs/ce752a3f-300d-4095-ac99-7e2e5ec3a10d/Untitled-cdac9658-5009-4bf1-af42-ecd4d2b81414.png)
🐞 🪲 Examples of errors
Track has no keys. You cannot publish an animation sequence with an empty track, i.e. a track that has no keys. To fix it, just give your track some keys (or delete the track) and publish again.

Insufficient permissions. This may happen if you select an animation sequence of a linker that has been deleted while your session has been running.

Disabled tracks
📽️ If you delete an entity or the component of an entity that is referenced by a track, the track will appear disabled and the entity or component in question will be crossed out in red. A disabled track due to a missing component can be re-enabled if you reattach the component on the entity in question.
![[object Object]](/images/docs/ce752a3f-300d-4095-ac99-7e2e5ec3a10d/7264f38d-6b6d-4183-adeb-d8e06e7a9ff3-d1ed10cc-e33e-46ce-94d8-432ae1592536.png)
How to play
You can play, pause and stop animation sequences. Stopping an animation sequence will restore the values of the first keys of each track.
Animation sequence editor
play, pause, stop:
To control the playback of an animation sequence use the play, pause and stop buttons in the animation sequence editor.

Livelink.js SDK
To play, pause and stop an animation sequence, you need to modify the component attribute playState of the animation sequence controller. (This attribute is hidden in the scene editor but can be modified using the SDK). playState is an int enum whose values can be:
0 - (stop)
1- (play)
2 - (pause).
stop:
play:
pause: