3dverse in 20 minutes
Welcome to 3dverse. In about twenty minutes you’ll learn the essentials and deploy your first app to the web.
Goals:
-
Understand the fundamentals
How 3dverse differs from traditional engines and browser-based frameworks.
-
Get to know the Console
The central place where you create projects, upload files, and launch scenes.
-
Run your first app locally
Scaffold a 3dverse application using widely used web development tools.
-
Deploy it to the web
Publish the app to GitHub Pages and share it with a simple URL.
Core Concepts in a Nutshell
Traditional 3D engines are monolithic: everything runs on the end user’s machine, assets must be distributed, and collaboration is an afterthought that often depends on external versioning tools.
By contrast, tools like Google Docs for text or Figma for 2D design show the power of cloud-native collaboration: content lives in the cloud, updates are instant, and multiple users can work together seamlessly.
3dverse brings that same cloud-native model to 3D — designed to scale with new hardware, networks, and ways of working.
Architecture
3dverse is built on three distinct tiers:
- The Platform is the authority layer — it manages assets, access, and sessions.
- The Cloud Renderer runs GPU processes in the cloud, each one powering a live 3D session.
- The Client is just a web page or app that connects to a renderer, sending input and receiving video and state.
This separation makes the system scalable in the cloud and ensures that collaboration and security are handled consistently.
Applications
A 3dverse application is in reality just a web application.
The front end of the web application connects to the cloud renderer through Livelink, a bespoke real-time protocol that streams input, state, and video.
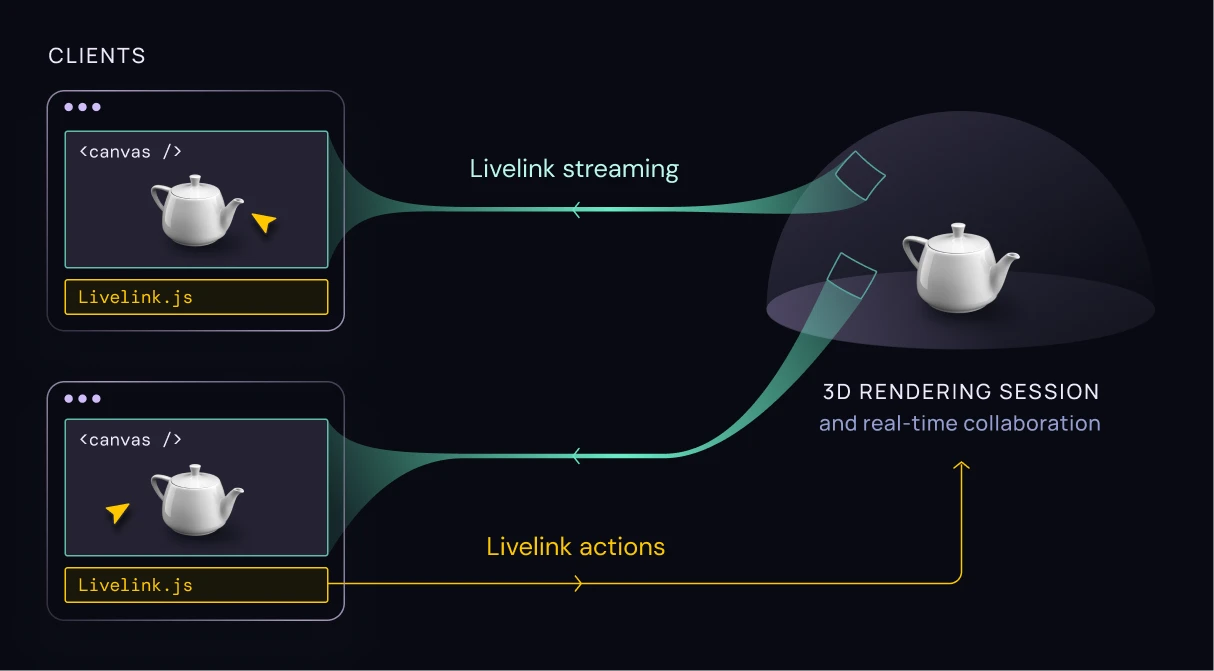
When you open the web application, you are really joining a rendering session — a live process of the cloud renderer hosting a scene, created and managed by the Platform. Multiple users can connect to the same session at once, enabling real-time collaboration without extra setup.
The rendering session consumes assets stored in the Platform. Assets include scenes, meshes, materials, textures, and more.
Access Control
Traditional engines usually rely on external tools — such as version control systems or shared drives — to manage access and keep projects consistent.
In 3dverse, this is different.
Assets are scoped to an environment, and the Platform itself enforces who can view or modify them through various methods.
Because access control is built in, the same rules apply whether you’re browsing stored assets or using them inside a rendering session.
With this foundation in mind, you’ll see why this quickstart feels different from setting up a traditional engine: rendering happens in the cloud, assets stay in the platform, and your app is just the interface.
The 3dverse Console
The Console is the web portal where you organize projects, manage assets, and launch rendering sessions.
For most developers, it is the starting point: you upload source files, inspect the converted assets and scenes, and manage the environments your web applications will connect to.
Beyond content management, the Console also provides collaboration features (inviting team members, setting permissions), operational tools (tracking sessions, monitoring usage), and developer essentials (generating API keys).
In this quickstart, we’ll focus only on the basics — enough to prepare a scene that your first web application can connect to.
Preparing Resources
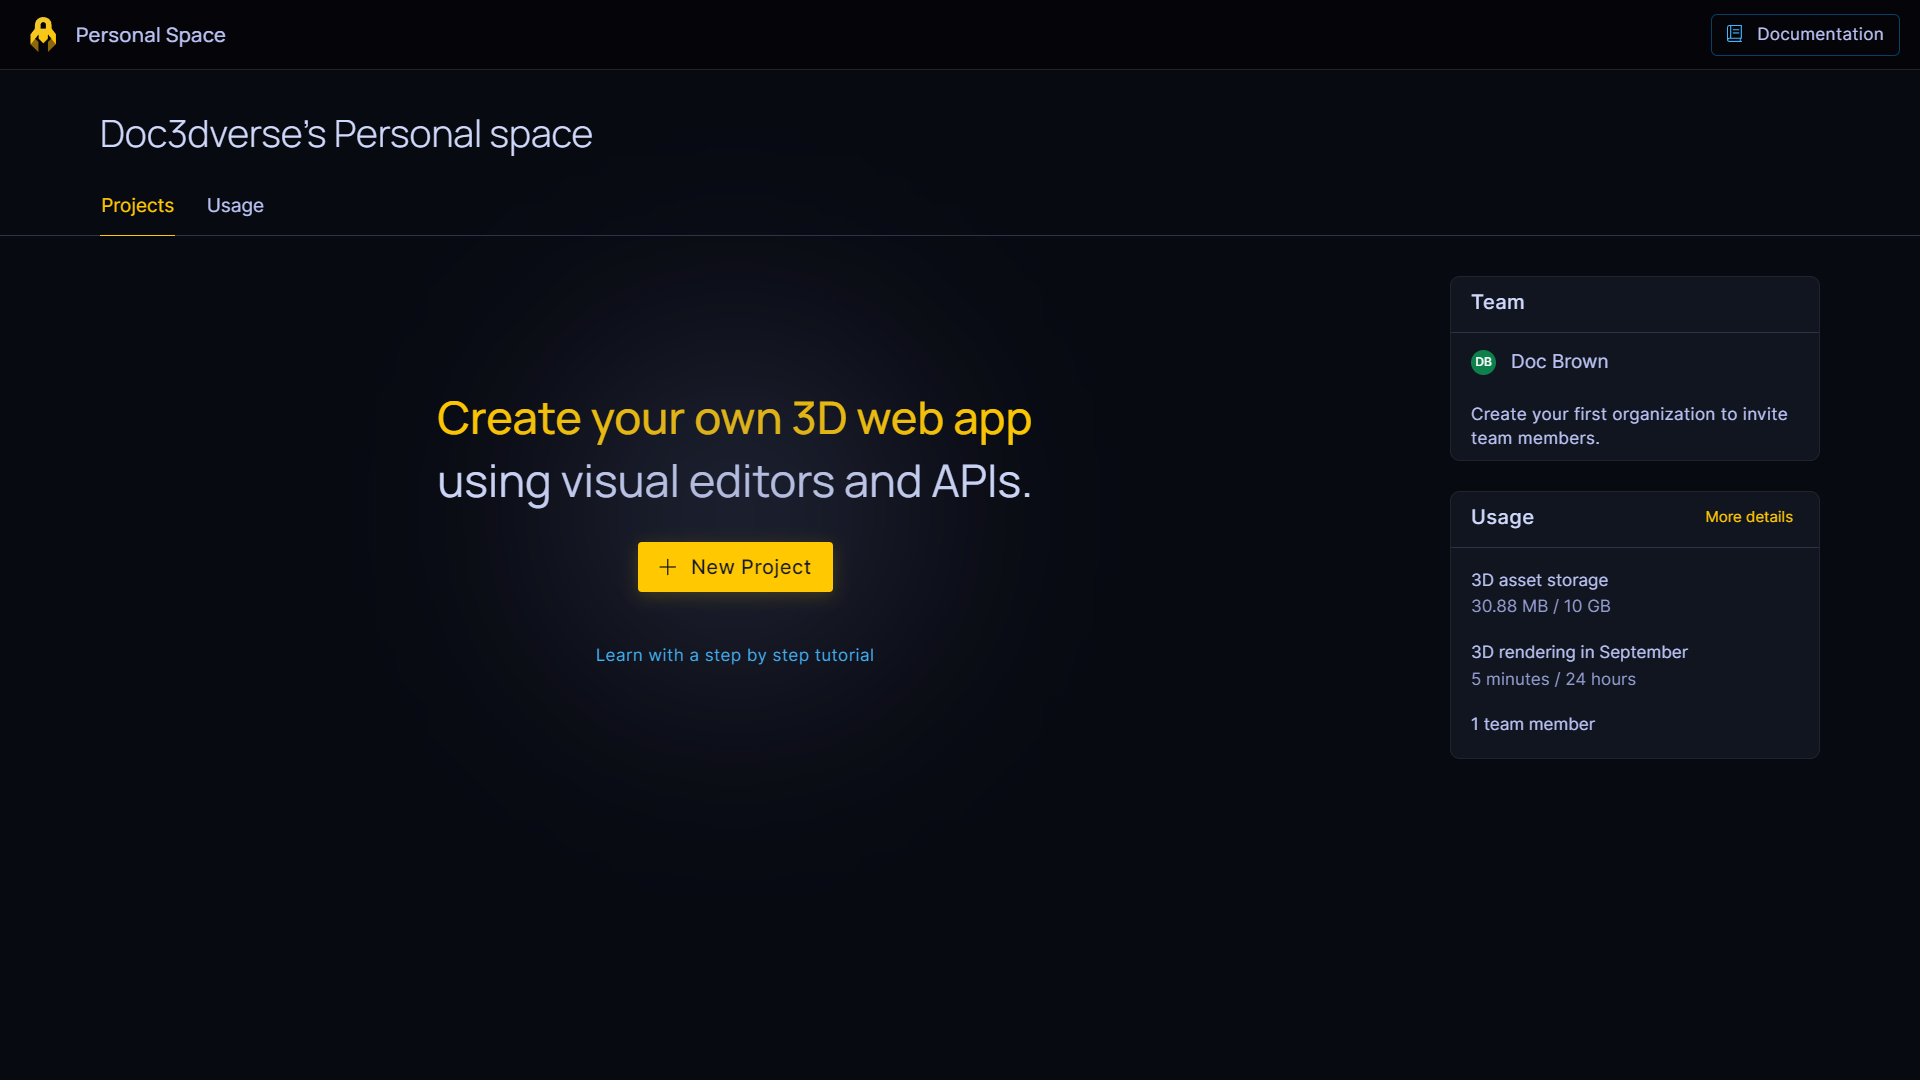
1. Create a New Project
Click the New Project
button to create your first project.
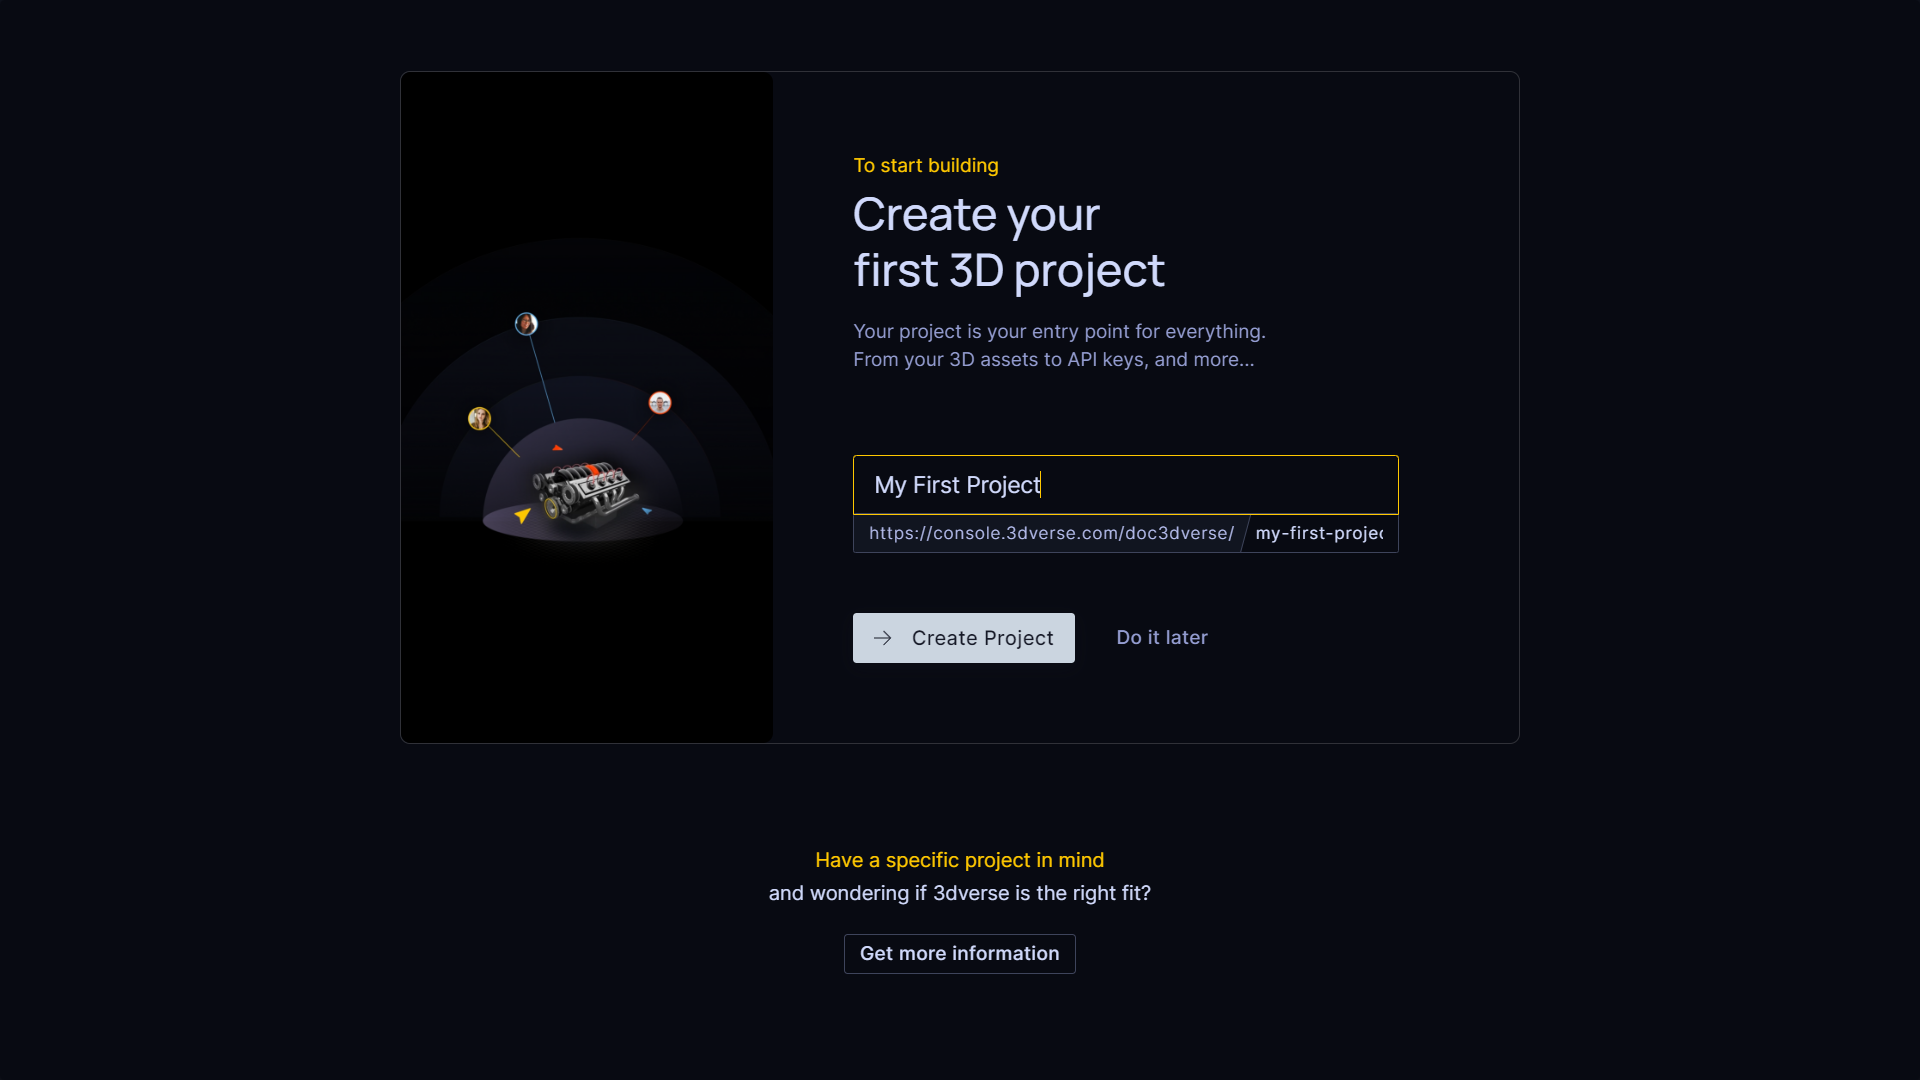
Every new project includes:
-
A default Environment — it’s implicit, so you won’t see it in the asset browser. You can confirm it in the Project settings or in the URL (
../default/...). -
A Public folder at the root of that environment — see the Asset Browser page.
-
A public token linked to the Public folder — you’ll find it under API Access page. This token is what allows your own web application to access the assets stored inside the Public folder.
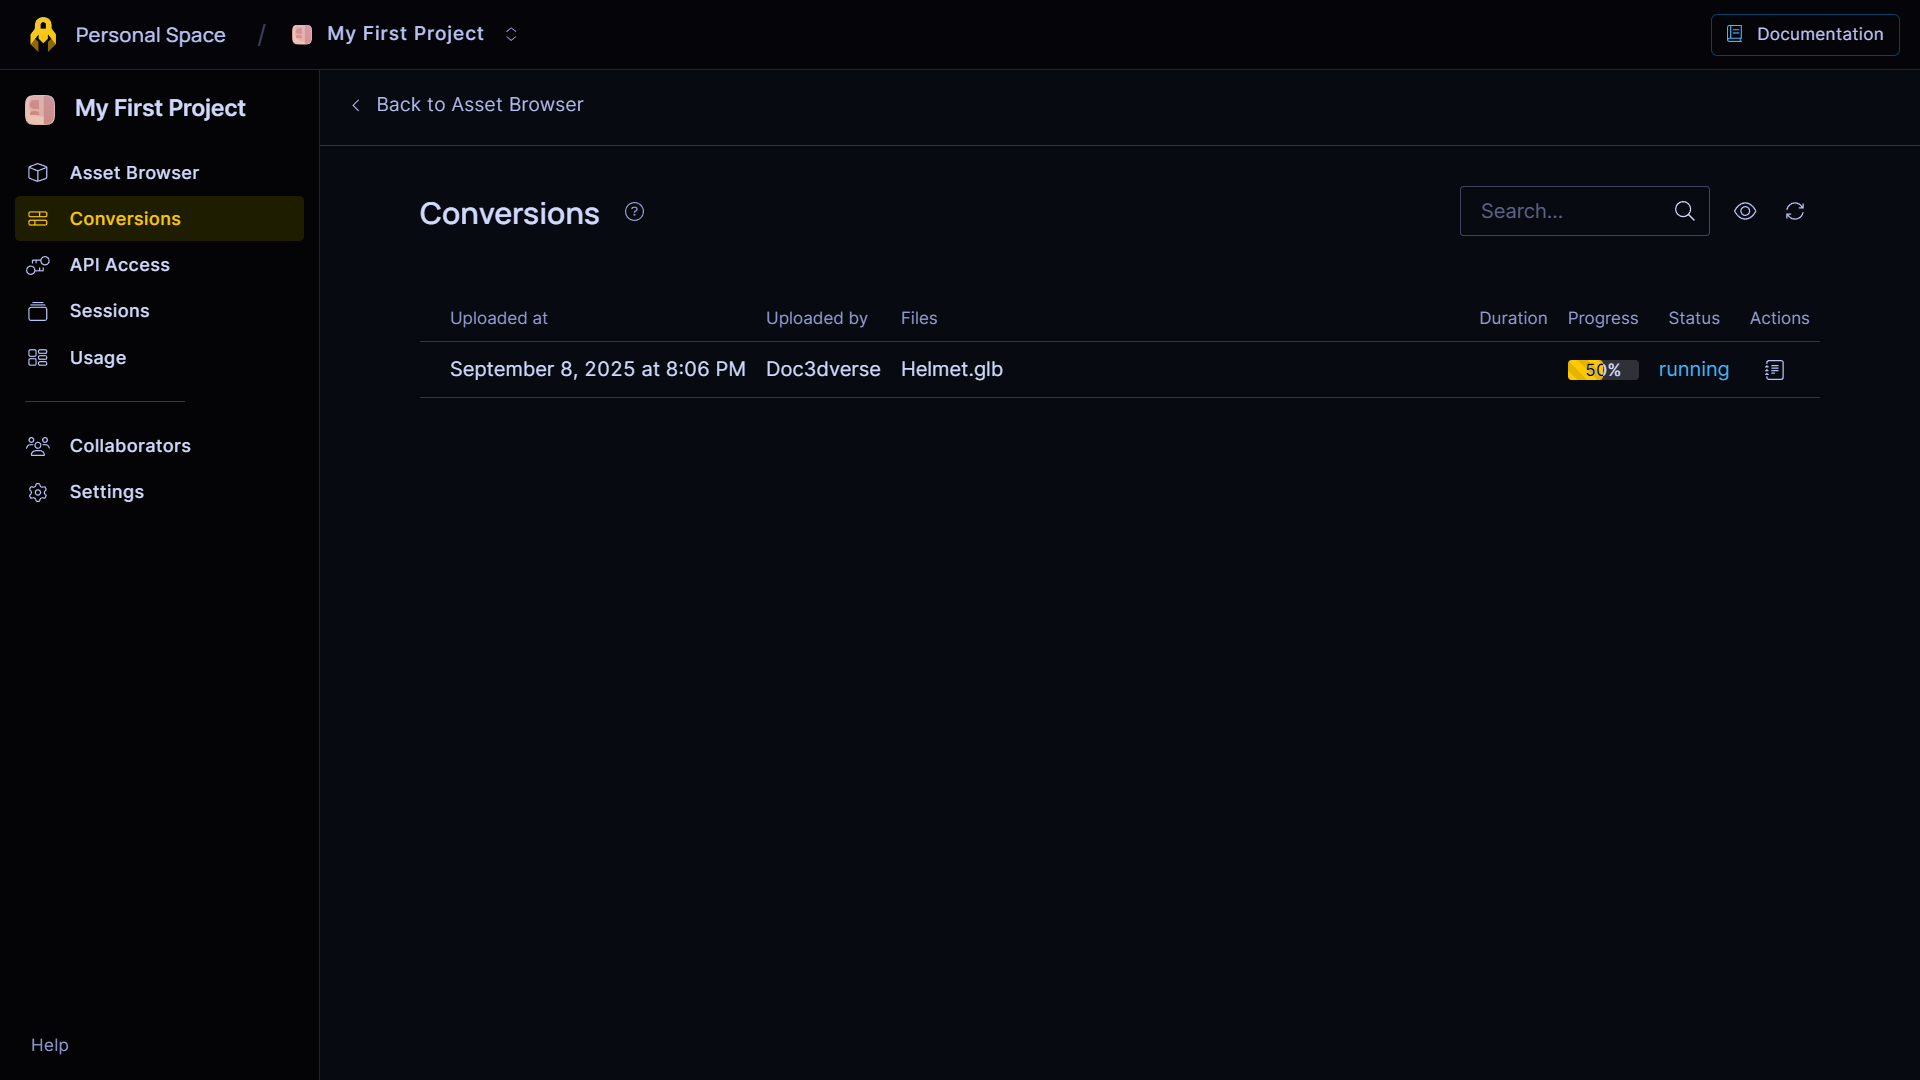
2. Upload and Convert a File
When a project is created, the Console launches an embedded tutorial that guides you through uploading a file, waiting for conversion, and opening the resulting scene.

The Console accepts common formats. Once uploaded, the file goes through the conversion process, which extracts 3dverse assets — scenes, meshes, materials, textures, etc.
You can follow the progress on the Conversions page:
3. Open the Scene
When conversion is complete, the tutorial invites you to open the new Scene asset in the Console’s Editor (the built-in scene editor).
4. What Else You’ll Find in the Console
Beyond these basics, the Console is also where you will:
- Invite collaborators to your project
- Generate API keys for application development
- Track and manage rendering sessions
At this point, you have a project, a public folder accessible via a public token, and a scene — enough to start building your first 3dverse web application.
Building Your First Application
With your scene prepared in the Console, it’s time to build a web application that connects to it. You’ll scaffold a project, provide your scene details, run it locally, and then publish it to the web.
1. Scaffold the Web App
Open a terminal and run:
npx create-3dverse-app@latest my-first-app
Follow the CLI prompts.
2. Run Locally
Start the development server:
cd my-first-app
npm run dev
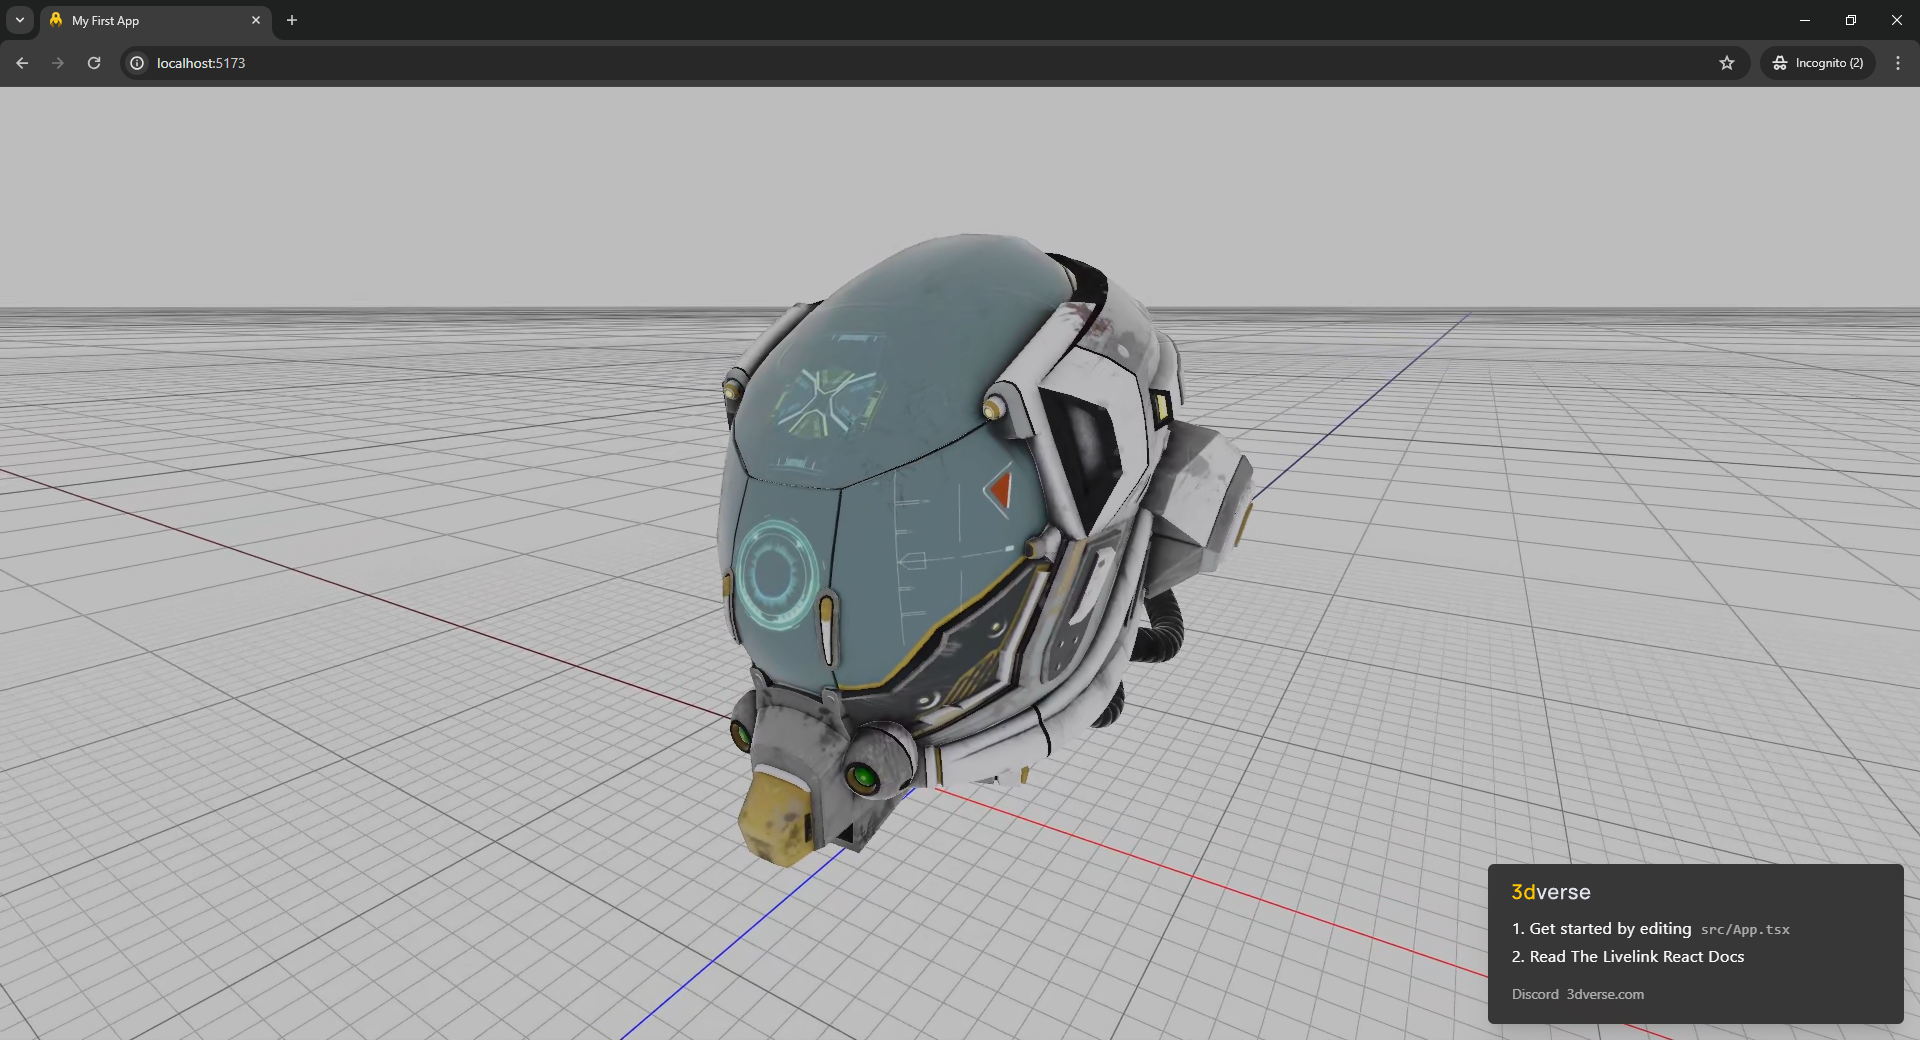
This launches the app on http://localhost:5173 (or similar).
Open it in your browser to see your scene streamed live from the 3dverse renderer.
3. Deploy to GitHub Pages
Push your project to a GitHub repository, then enable GitHub Pages in the repository settings.
create-3dverse-app can set up a GitHub Actions workflow that automatically builds and publishes the dist/ folder .
From the root of your repository, run:
npx create-3dverse-app@latest --deploy
The CLI will prompt you for a few details — just follow along.
Afterwards, commit and push to the deploying branch.
Once GitHub builds your app, it will be live at: https://<username>.github.io/<repo>/.
Conclusion
In about twenty minutes, you’ve:
- Understood the fundamentals of how 3dverse works.
- Prepared a scene in the Console and made it accessible.
- Scaffolded and ran your first application.
- Deployed it to the web with GitHub Pages.