Animation Graph Nodes
Animation Sample
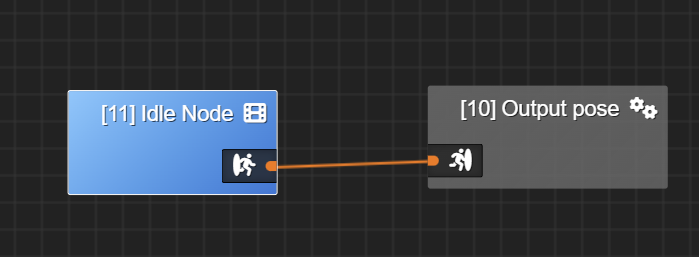
An animation sample node simply samples its given animation and outputs it.
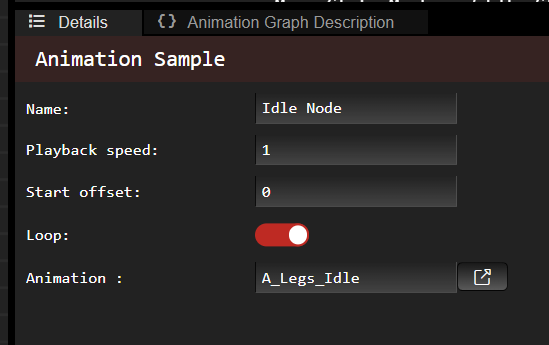
In the details of animation sample node you can specify things like:
- animation
- the animation for the selected animation set. This value is synchronized with the corresponding animation set entry in the Animation Set Editor.
- playback speed (float)
- start offset (float, normalized value between 0 and 1)
- this will force the sampling to start at a given offset of the animation. 0 corresponds to the start and 1 corresponds to the end.
- loop
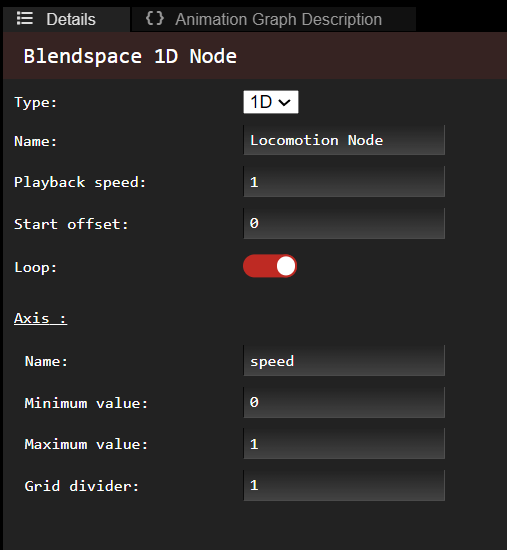
Blend Space 1D
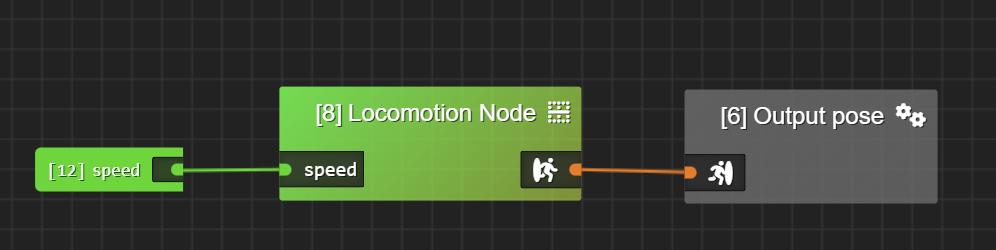
A blend space 1D allows you to control the blend between different animations (or control points) through a float input. It is 1D because we define control points along one axis.
Note that when you add a control point in the Blend Space Editor, you can edit its corresponding animation in the Animation Set Editor.
In the example above, my Blend Space 1D has two control points:
- Walk Control Point which is at speed = 0
- and Run Control Point which is at speed = 1.
Walk Control Point and Run Control Point reference walk and run animations respectively.
In my scene, when I change the value of speed (in my animation controller) to 0.5, then this node will blend equally between Walk and Run animations. If I change the value of speed to 0.75, it will blend both animations but the Run animation will have a weight of 0.75, while the Walk animation will have a weight of 0.25.
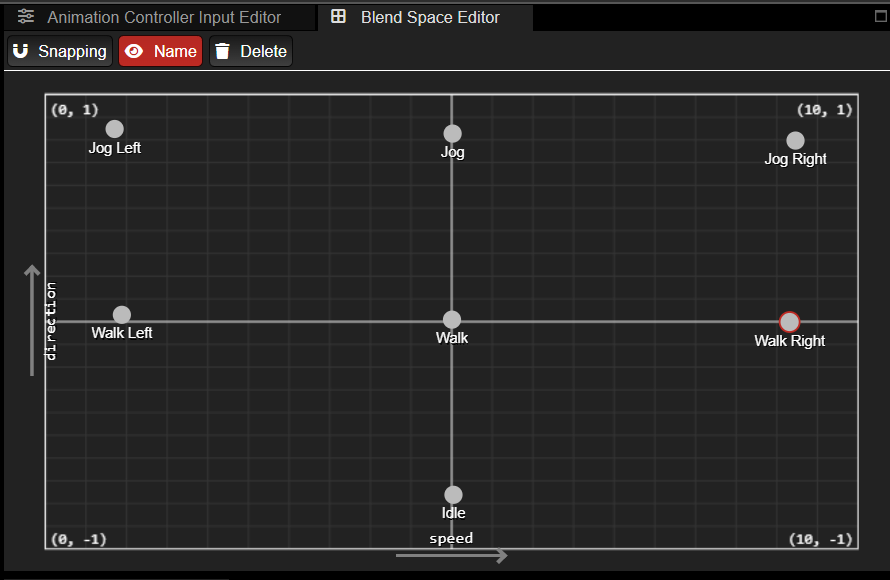
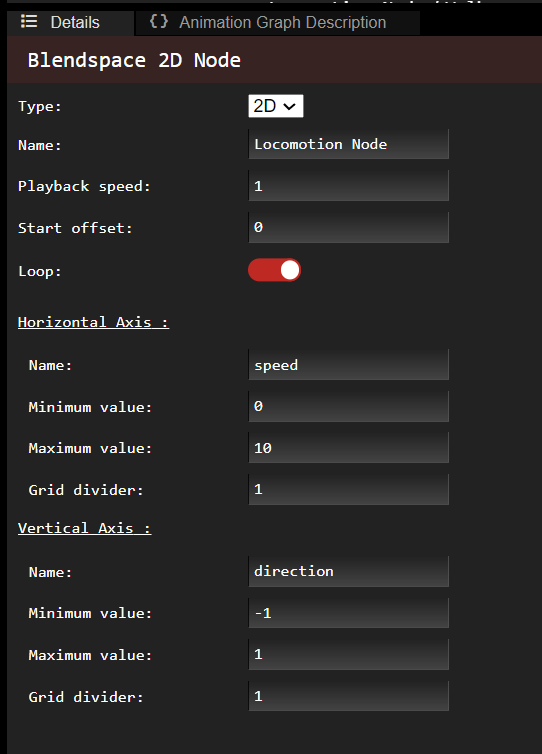
Blend Space 2D
The idea is the same as Blend Space 1D except now we can control the blend of animations using two float inputs (which correspond to X and Y axis in Blend Space Editor).
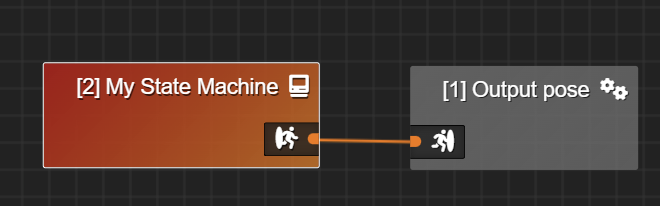
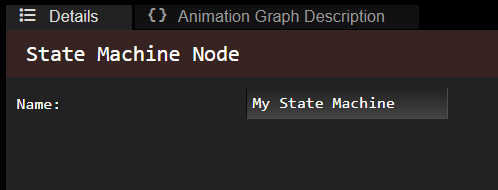
State Machine
A state machine node is… a state machine! When you click on a state machine node, its state machine will open in the State Machine Editor above the State Editor. The output pose of a state machine node is the output of its state machine.
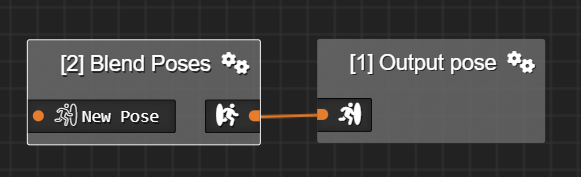
Blend Poses
Blend Poses allows you to blend different poses and give them different weights.
You can give the Blend Poses an arbitrary amount of poses to blend with, and then specify the pose weights. Pose weights should be between 0.0 and 1.0. Bone mask is optional and can be specified if you’d like to give bone weights for that animation layer. If bone mask has no input, then each bone will have a weight of 1.
Each subsequent pose/weight/bone mask layer will override the previous layers.
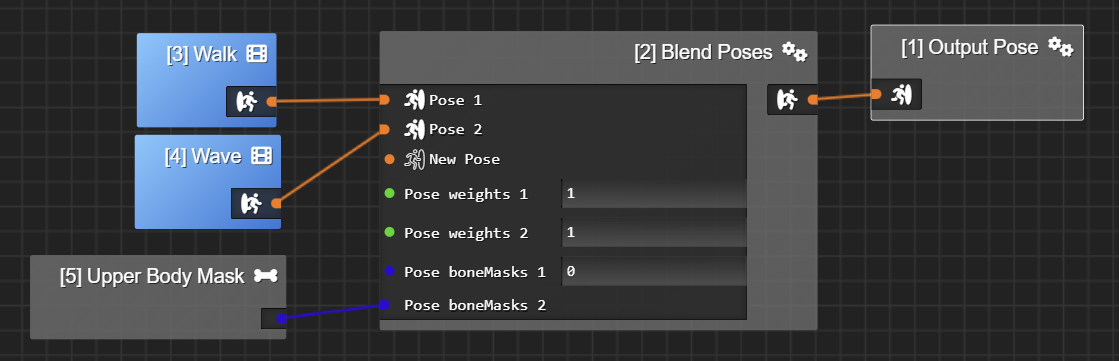
- The walk animation has a weight of 1 and no bone mask specified.
- The wave animation has a weight of 1 and has an upper body mask specified (the bones in the upper body have a weight of 1, and the other bones have a weight of 0).
- The base walk animation layer will generate a walk animation and the wave animation layer will assign the upper body bones the wave animation.
- The output will be a skeleton pose that is walking on its lower body, and waving with its upper body.
To create a bone mask node to assign to the Blend Poses node, right click on State Editor
and select the Bone Mask node
and give it a name. To edit the bone mask, select the node and the bone mask editor will open. You will be able to assign weights per bone there.
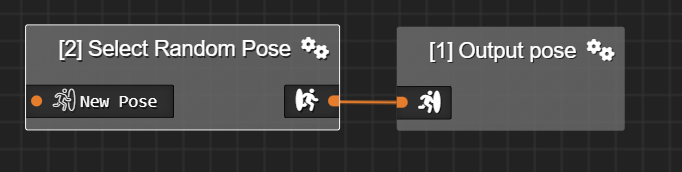
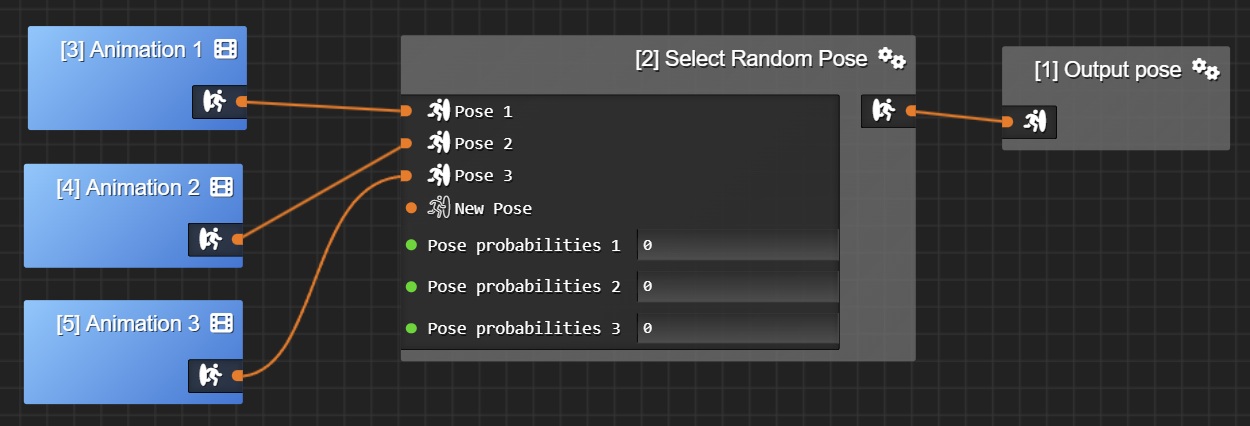
Select Random Pose
Select Random Pose
takes an arbitrary amount of input poses and will select to output one of those poses at random. When a state begins to run, the random input is chosen. The random input will stay the same until that state transitions to another one. Then, when some other state transitions to our state again, the random input will be recalculated.
You can also specify Pose probabilities. If specified, probabilities are between 0.0 and 1.0 and should all add up to 1.0.
IK Aim
IK Aim acts on a single bone (the aiming bone) to orient, or aim, a forward vector (in bone local space) to a target position (in world space). This can be used to aim a head bone so it looks at a target or to aim a weapon. The up vector (in bone local space) is also used to keep the bone oriented in the same direction as the world up (0, 1, 0). The node also exposes an offset (in bone local space) from where the forward vector should aim the target (this can be used to aim the “eyes”, which could be relative to the neck bone).
The chain length is the number of bones that are corrected by IK.
The chain weight is the weight given to whole IK process, allowing blending in and out.
The bone weight is the weight given to IK for each bone of the chain (except for the last bone which is 1). This directly affects correction spreading.
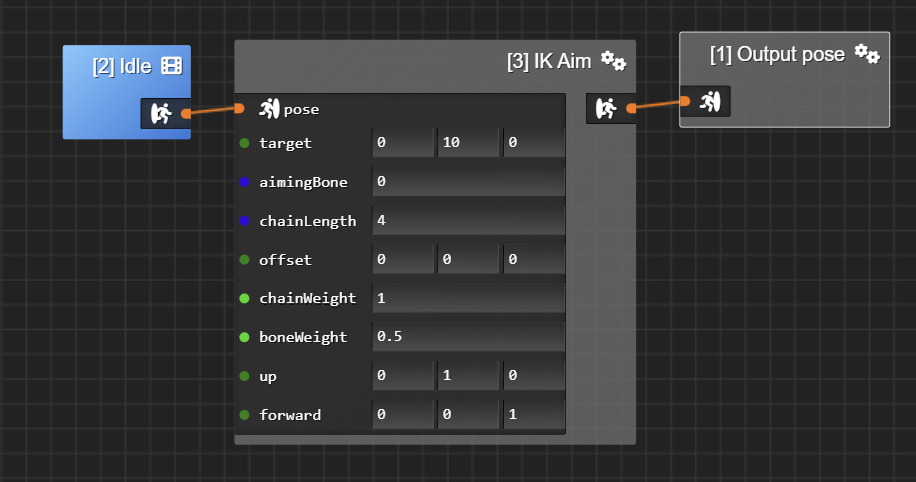
Target can be either a vec3 input or an entity input. If target is an entity input, the IK Aim will try to aim at this target entity’s world space position each frame.
Aiming bone expects a uint, i.e. the aiming bone index.
All of the inputs (except for pose) can either be animation controller inputs or hard coded in the node.
To help debugging the up and forward vectors, then make sure you Enable debug lines
and Draw IK
in the scene settings. This will draw the up vector in green and forward vector in blue (in world space) from the aiming bone’s location.
IK Two Bone
An IK Two Bone node is used to animate a chain of three bones (startBone, midBone and endBone) that remains on the same plane: like arms (shoulder, elbow, wrist) or legs (hip, knee, ankle). The end bone will try to reach a target position and the other bones will position themselves in response. There can be intermediate bones between the start, mid and end bone. However these bones must be part of the same hierarchy, aka ancestors of the last leaf bone (=endBone).
The pole vector defines where the direction the middle bone should point to. It should be specified in model space of the skeleton.
Weight is the weight given to whole IK process, allowing blending in and out.
Twist angle additionally rotates the IK chain around the vector defined by start-to-end bone vector.
Soften allows the chain to gradually fall behind the target position. It can prevent the bone chain from snapping into final position, softening the final degrees before the bone chain becomes flat.
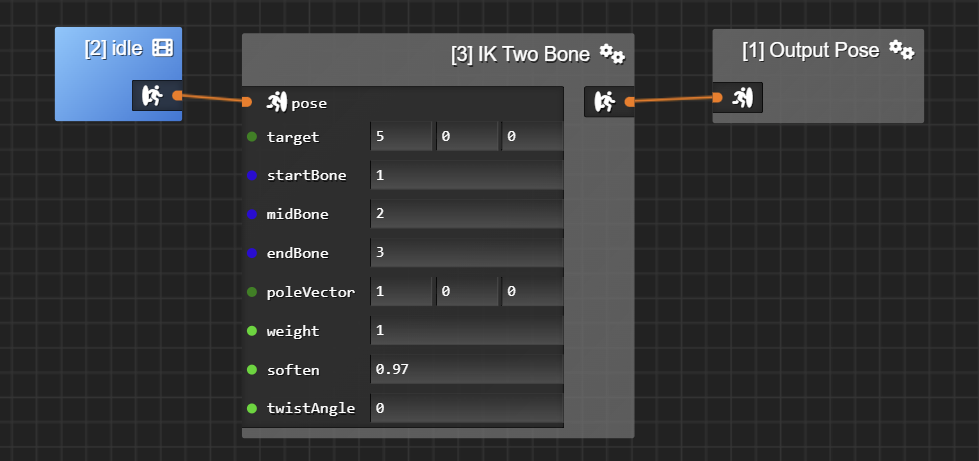
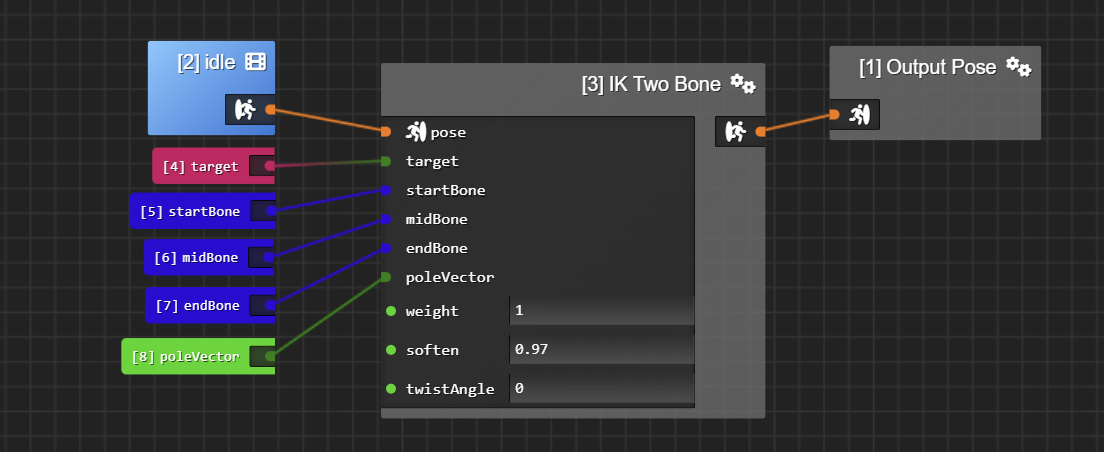
Target can be either a vec3 input or an entity input. If target is an entity input, the IK Two Bone will try to reach this target entity’s world space position each frame.
Start, mid and end bone expect a uint, i.e. the bone index.
All of the inputs (except for pose) can either be animation controller inputs or hard coded in the node.
To help debugging the pole vector, then make sure you “enable debug lines” and “draw IK” in the scene settings. This will draw the pole vector in red (in world space) from the mid bone’s location.